Table of Contents
About
Sonoff is a Chinese IoT device manufacturer that produces smart mains power plugs with various capabilities, such as, toggling the mains current, measuring power consumption and even incorporates sensors for humidity and temperature. The device starts at about USD5 and packs a lot of features that will be discussed in this section.
Security
One of the first and foremost things to notice about these hardware devices is that they will start up from the official firmware and then with a button press, the device will enter a pairing mode. The pairing mode will also take place when the device loses connectivity. During this period, any wireless device can pair with the Sonoff and even log-in to send commands.
The device will create a network preceded by the string:
ITEAD-10000
with the default password:
12345678
Furthermore, whilst exchanging messages, the Sonoff device does not care about the validity of the certificate presented by either the HTTPs server (during the initialization phase) nor the WebSockets HTTPs server used for subsequent communication.
Privacy
One interesting feature is that Sonoff devices send query requests that ask the WebSockets server information about other Sonoff devices that have registered with the WebSockets server. This is some form of discovery that would inform the Sonoff device of all other devices - however, it is not clear what the Sonoff device will end up doing with that information.
Controlling the Device via WebSockets
The official firmware provides a way for commands to be sent via WebSockets. In order to communicate with the device, a handshake is involved that requires:
- an HTTPs server (self-signed certificates are sufficient),
- a WebSockets server used for the rest of the communication.
Protocol Diagram
              +------------+
              |            |    +------------+     +------------+
              |   Sonoff   |    |   HTTPS    |     | WebSockets |
              |            |    |   Server   |     |   Server   |
              +-----+------+    +-----+------+     +-----+------+

                    |                 |                  |

     HTTP GET       |                 |                  |
     /device
------------------->|                 |                  |

    Body JSON:      |                 |                  |
    deviceid,
    apikey, access  |                 |                  |

<-------------------+                 |                  |

    HTTP POST to    |                 |                  |
    "/ap"
    Body: JSON      |                 |                  |
    version, ssid,
    password,       |                 |                  |
    serverName,
    port            |                 |                  |

------------------->|                 |                  |

                    |                 |                  |
                      WebSockets
                    | configuration   |                  |
                      request
                    |                 |                  |
                     ---------------->
                    |                 |                  |

                    | Body JSON:      |                  |
                      error, reason,
                    | IP, port        |                  |

                    |<----------------+                  |

                    |                                    |

                    |                                    |
                      Request actions: date, query,
                    | update, register                   |
                      Communication shares an API key.
                    |----------------------------------->|
                     ----------------------------------->
                    |----------------------------------->|
                     ----------------------------------->
                    |                                    |

                    |                                    |

                    | Request action:                    |
                      update
                    | Values: switch,                    |
                      timers, ...
                    |<-----------------------------------|
                     <-----------------------------------
                    |                                    |

                    |                                    |
Protocol Description
The procedure can be roughly sketched as:
- Send an HTTP GET request to
http://DEVICE_IP/device(whereDEEVICE_IPis the IP of the device on the wireless network) and the Sonoff will reply with a JSON object:
{
  "deviceid":"10000xxxxx",
  "apikey":"xxxxxxxxx-xxxx-xxxx-xxxx-xxxxxxxxxxxx",
  "accept":"post"
}
where:
deviceidis the device identifier,apikeyis a randomly generated GUID (that does not matter).
- Send a message to the device via POST to
http://DEVICE_IP/apto set the wireless network to connect to and the WebSockets server to communicate with:
{
  "version": 4,
  "ssid": NETWORK_SSID,
  "password": NETWORK_PASSWORD,
  "serverName": WEB_SERVER_IP,
  "port": WEB_SERVER_PORT
}
where:
NETWORK_SSIDis the wireless network SSID,NETWORK_PASSWORDis the wireless network password,WEB_SERVER_IPis the hostname where you have a WebSockets server set up,WEB_SERVER_PORTis the port of the WebSockets server
At this point, the Sonoff will close the access point and connect to the WebSockets server for further communication. Unlike HTTP, WebSockets allow passing messages back and forth between endpoints. The Sonoff device will send queries to the WebSockets server and, in-turn, the WebSockets server can send messages to control the device.
Messages Initiated by Sonoff
| Request sent by Sonoff | Description | Reply Expected by Sonoff |
|---|---|---|
action -> register, romVersion, deviceid, model | The Sonoff registers with the WebSockets server. | None, but the WebSockets server is expected to store the identifying information of the registering Sonoff device for further use. |
date | The Sonoff requests the current date. | {
"error" : 0,
"deviceid" : DEVICE_ID,
"apikey" : REQUEST_API_KEY,
"date" : DATE_IN_ISO_FORMAT,
}
|
query | Sonoff requests all devices known by the WebSockets server. | {
"error" : 0,
"deviceid" : DEVICE_ID,
"apikey" : REQUEST_API_KEY,
"params" : ARRAY_OF_DEVICES,
}
where |
action -> update, params -> switch -> on or off | The Sonoff devices wants to update its state. | None required. The JSON path params.switch will be set to either on or off depending on whether the Sonoff switch is powered on. |
Messages the Can be Sent to the Sonoff
| Requests sent to Sonoff | Description |
|---|---|
{
  "action" : "update",
  "value" : {
      "switch" : POWER_STATE
  }
}
| Toggle the Sonoff switch on or off. POWER_STATE can be the string on or off. |
{
    "action" : "update",
    "value" : {
    "timers" : [
        {
            enabled : true,
            type : ONCE_OR_REPEAT,
            at : time,
            do : {
                switch : POWER_STATE
            }
        }
    ]
}
| Set the device timers all at once. ONCE_OR_REPEAT can be the string once or repeat and POWER_STATE can be the string on or off. |
Flashing Firmware and Programming
Sonoff devices contain 1MiB of flash memory, amongst which, the official firmware. Replacing the firmware with third-party firmwares can add software features. For instance, the Sonoff can be used with OpenHAB in order to design your own smart habitat but integration with OpenHAB requires MQTT support that the official firmware does not have.
There are several firmwares available for the Sonoff:
- Tasmota - seems to be the most advanced (feature wise) and is known to work with OpenHAB.
Flashing Custom Firmware
The flashing process of a Sonoff device implies opening up the device and connecting to the serial port pins on the main board. The flashing process differs from device to device given multiple possible arrangements of the serial pins on the Sonoff boards:
Regardless of the Sonoff version, the procedure can be roughly described as:
- download a firmware file (for instance, the Tasmota firmware file
sonoff.bin). - connect the Sonoff to a computer in flash mode via a serial cable or USB to serial cable,
- backup, erase or overwrite the firmware with the new firmware
Flashing the firmware is rather straightforward and involves using esptool.
Windows
On Windows, esptool.exe can be used to handle flashing the Sonoff:
Having obtained a firmware, say sonoff.bin from Tasmota, place the sonoff.bin alongst the esptool.exe tool in the same directory and issue from a command prompt:
esptool.exe -vv -cp COM3 -bz 1M -bm dout -cf sonoff.bin
where:
-vvincreases the verbosity level,-cp COM3uses the serial device attached toCOM3,-bz 1Msets the flash chip size to 1MiB (as with all Sonoff devices),-bm doutset the flash chip interface mode todout,-cf sonoff.binspecifies the file to be used for flashing the firmware
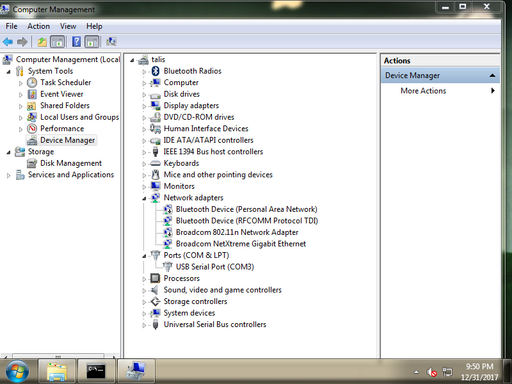
In order to determine the COM port of the attached device (or USB to serial TTL device), open up the Device Manager and locate the Ports (COM & LPT) section.
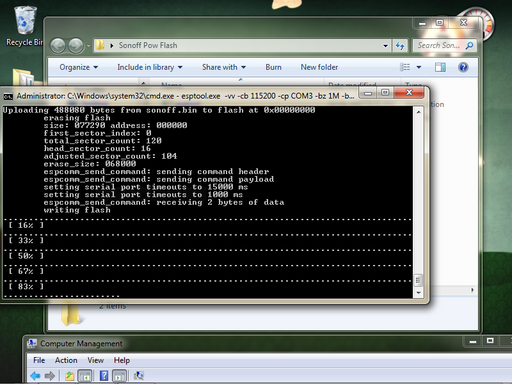
Upon executing the command, esptool will flash the firmware - the process will take no more than a few minutes.
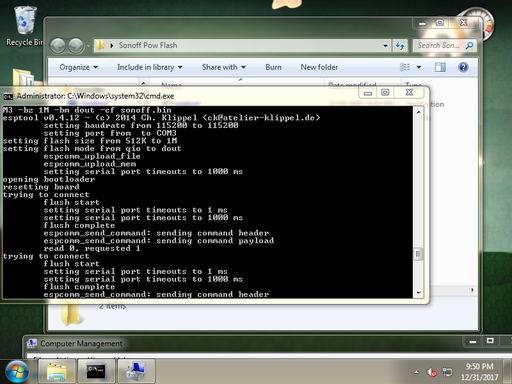
One common mistake is to have attached TX and RX the wrong way round on the Sonoff device. This will not damage the device but it will prevent esptool from successfully connecting to the Sonoff and giving up after multiple attempts.
Simply, switch the TX and RX leads and attempt the flashing process again.
Tasmota Firmware
For various notes on the tasmota firmware please see:
particularly the notes on setting the WifiConfig option since it is an essential setting if your Wifi device is powered by the Sonoff.
Index
For the contact, copyright, license, warranty and privacy terms for the usage of this website please see the contact, license, privacy, copyright.


