Table of Contents
About
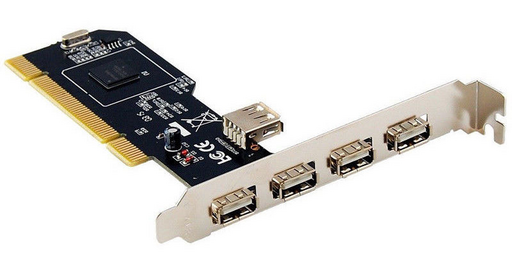
The Amiga Mediator produced by Elbox accepts diverse PCI cards except for the USB card which has to be a Spider USB also produced by Elbox. The difference in price between an USB 2.0 card from a regular producer and the Elbox USB card is a whooping USD70. Technically, both the spider USB and a common USB 2.0 card priced at no more than USD4 use the same AMTEL / NEC chip. Unfortunately, Elbox has designed the Mediator chips to refuse any other card than their own USD75 Spider USB card.
The following guide illustrates how to modify an USD4 card that uses the same chip such that the Mediator will accept it as a valid Spider USB card. In brief, the procedure involves reprogramming the EPROM on the USD4 card in order to set the PCI vendor ID to match the Spider USB card.
Requirements
In total this is a USD10 project (assuming all soldering equipment is provided) which allows you to spare USD60 and add an USB card to the Amiga Mediator.
- An USB 2.0 PCI card - a NEC based card, for instance the NEC D720101F1 which even looks identical to the Spider USB card. These go for about USD5.
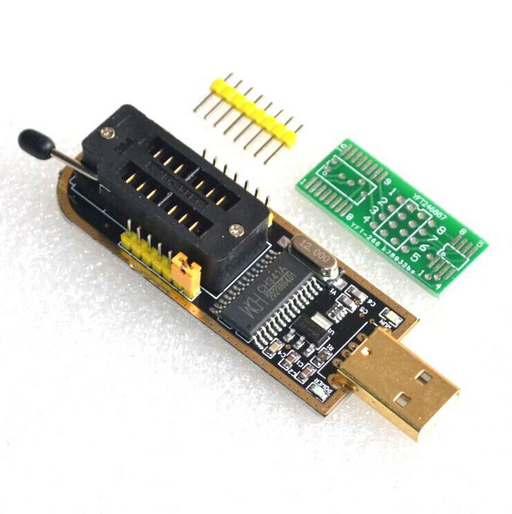
CH341AEPROM programmer - can be found on E-Bay for no more than USD4 from producers in China and, perhaps USD6 to USD7 otherwise.
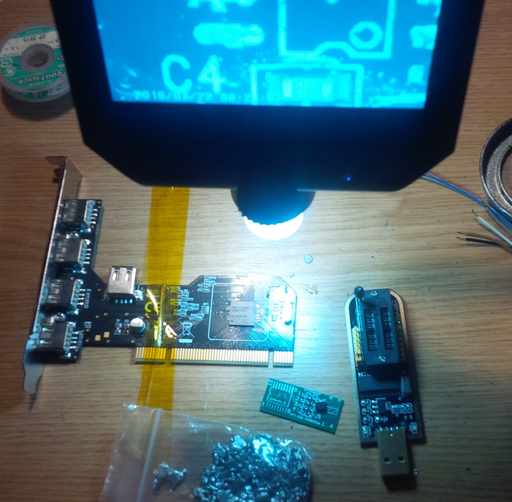
- All the necessary tools to solder - the EPROM BIOS chip on the USB card is very small in dimension such that a microscope is recommended to ensure proper soldering.
Requirements
Desoldering the EPROM BIOS
Upon receiving the USB card, the EPROM BIOS has to be desoldered off the board. The BIOS chip is very small, about  . The best way is to use some Chip Quik that will immediately desolder the EPROM BIOS without heating up the processor too much.
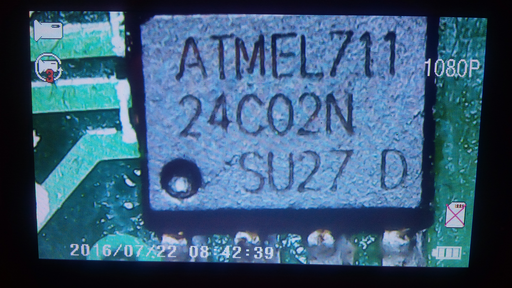
Before desoldering, make note of the indicator on the chip that represents pin 1 - there will be a dent marking the pin.
The BIOS in this case is an ATMEL 24C02N. The dent you can observe under the microscope marks pin 1 and the orientation should be respected when fitting the chip in the EPROM programmer and also when soldering the EPROM chip back onto the board.
Programming the BIOS
In order to program the BIOS, the ATMEL 24C02N chip is soldered onto the provided breakout board (whilst minding the marked pin 1 to match the marked pin 1 on the EPROM programmer breakout board).
The image shows the correct orientation - pin 1 on the board must face the lever that opens and closes the EPROM programmer's fixing grate.
Programming should be performed on a Windows machine (note that a virtual machine will not work) with the provided software in the download section. First, install the driver by clicking the setup tool and then connect the EPROM programmer with the BIOS fitted.
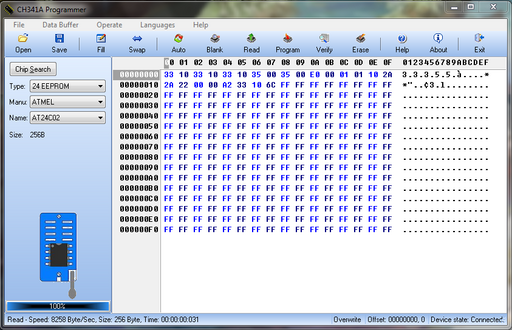
With the programmer connected, launch the provided CH341A program and select the following options:
Type->24 EEPROM,Manu.(Manufacturer) ->ATMEL,Name->AT24C02
Note that some guides indicate that if you do not see a Detect button then the chip is not recognized - this is not true and the Detect button appears only for the 25 SPI FLASH option.
Make sure that the Device state is set to Connected. You can safely ignore the software's illustration that indicates which way round the chip goes - the illustration is wrong.
Finally, press the Read button and the BIOS should appear to fill in the blank FFs.
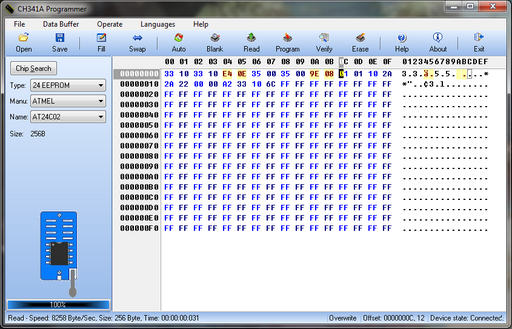
The string that must be changed is right at the start and illustrated in the following image.
Change the sequence:
33 10 33 10 33 10 35 00 35 00 E0 00
into:
33 10 33 10 E4 0E 35 00 35 00 9E 00
and then press Program to write the changes. You may see a message saying that the buffer matches the device - this means that the bytes have been written.
You can now safely disconnect the BIOS and solder it back onto the board.
Installing Poseidon and Adding the Driver
With the card inserted into the Mediator, boot the Amiga into Workbench. You will know pretty quickly whether the modification worked or not because the Amiga will just fail to boot if the USB card is not recognized.
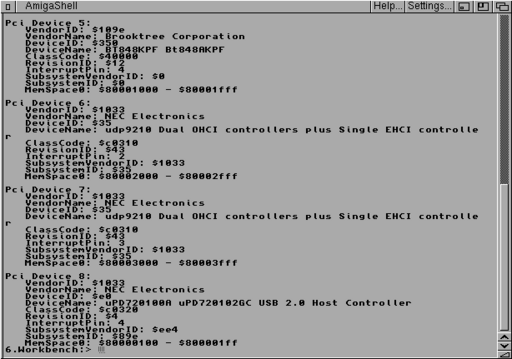
Once Workbench has loaded, open up a shell and type:
PciInfo
which should list all the PCI devices on the Mediator board. If the modification succeeded, you should see your NEC card listed amongst the PCI devices.
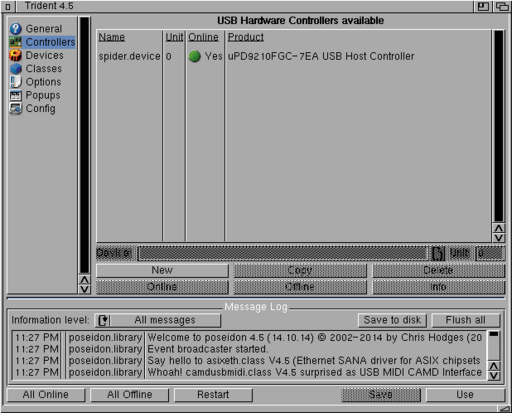
Next, install Poseidon v4.5 and copy the provided spider.device to DEVS:USBHardware/. Launch Tident from Workbench:Prefs and select Controllers. Click on New and then select the spider.device from DEVS:USBHardware/. Finally, press Online and then Save.
Congratulations, you now have a very good, cheap and reliable USB PCI card without investing a lot of money into the Spider USB card!
spider.device adds three new devices which can be added on the command line by issuing:
AddUSBHardware DEVS:USBHardware/spider.device 2
AddUSBHardware DEVS:USBHardware/spider.device 0
AddUSBHardware DEVS:USBHardware/spider.device 1
or by adding devices in Poseidon by selecting spider.device and entering unit numbers 0, 1 and 2.
For the contact, copyright, license, warranty and privacy terms for the usage of this website please see the contact, license, privacy, copyright.
