Table of Contents
News
- 22 February 2020
- Added support for free Google TTS alongside PicoTTS.
About
One of the drawbacks of the Amazon Alexa is that there is no programatic way to make Alexa talk if a cloudless solution is desired where Alexa is to be used directly without a helper Amazon hosted application. You can talk to Alexa, and play the "Simon says" game, where Alexa will repeat a phrase spoken to it, but there is no software available to type a phrase and to make Alexa speak it.
There are many possible applications that could benefit from such a feature - notably, Alexa works well as a notifier, it already packs applications that are able to trigger reminders, alarms and even shopping alarms. So, why not extend Alexa to be able to send your own notifications for Alexa to utter them out loud. For instance, monitoring server status and using Alexa as a vocal notifier when a service state changes.
Methodology
The entire setup described in this article consists in using good old text-to-speech (TTS) on a small Raspberry Pi board, coupled together with an Alexa remote that contains a microphone for the Raspberry Pi to speak into.
Requirements
- Raspberry Pi Zero W - the
Wmodel is preferred due to its wireless module that can provide convenient connectivity. The price for a bare-bones Raspberry Pi Zero W is about USD25.

- Alexa remote - it would be wise to purchase a second-hand Alexa remote, particularly from China, without the FireTV in order to reduce the costs drastically. After all, you do not care about the "scratches or scuffs" when you are going to strip the remote down to its circuitry.

the cost of a second-hand Alexa remote varies between USD10-18.
- A plastic case or holder - the plastic case should be no less than
 , length, width and height in order for all the components to fit in tidily.

- Resistors - the main purpose of the resistors will be to create a voltage divider: from
 provided by the Raspberry Pi W GPIO pins to
  required to trigger the buttons on the Alexa remote. For perfect values, you can pick
  and
and  resistors that should do the job - although having two resistors with should be within the tolerance level of the circuit and sufficient to trigger the button.

- [Optional]
 to stepdown circuit - the remote has to be powered somehow: using batteries is one way to go but it is inconvenient given that the Raspberry Pi feeds off and
  USB connector. The stepdown circuit (a more sophisticated alternative to the resistor voltage divider) can then be used to power the remote without needing extra AAA batteries. These go for about USD1 each with free postage from China.

- Either an USB / micro USB soundcard or the more sophisticated and expensive USD25 Audio Injector card for the Raspberry Pi. The Audio Injector is a more stable and elegant solution (which was preferred during the development of this project) however it is a nightmare to work with due to its entirely non-existent documentation - the best the developers have come up with is "forums"; so essentially, digging through a communal trashcan. Really. No. Documentation. None!

- Mono Speaker - regardless what you pick, there is not much point in stereo and most earbud speakers go for about USD2-5.

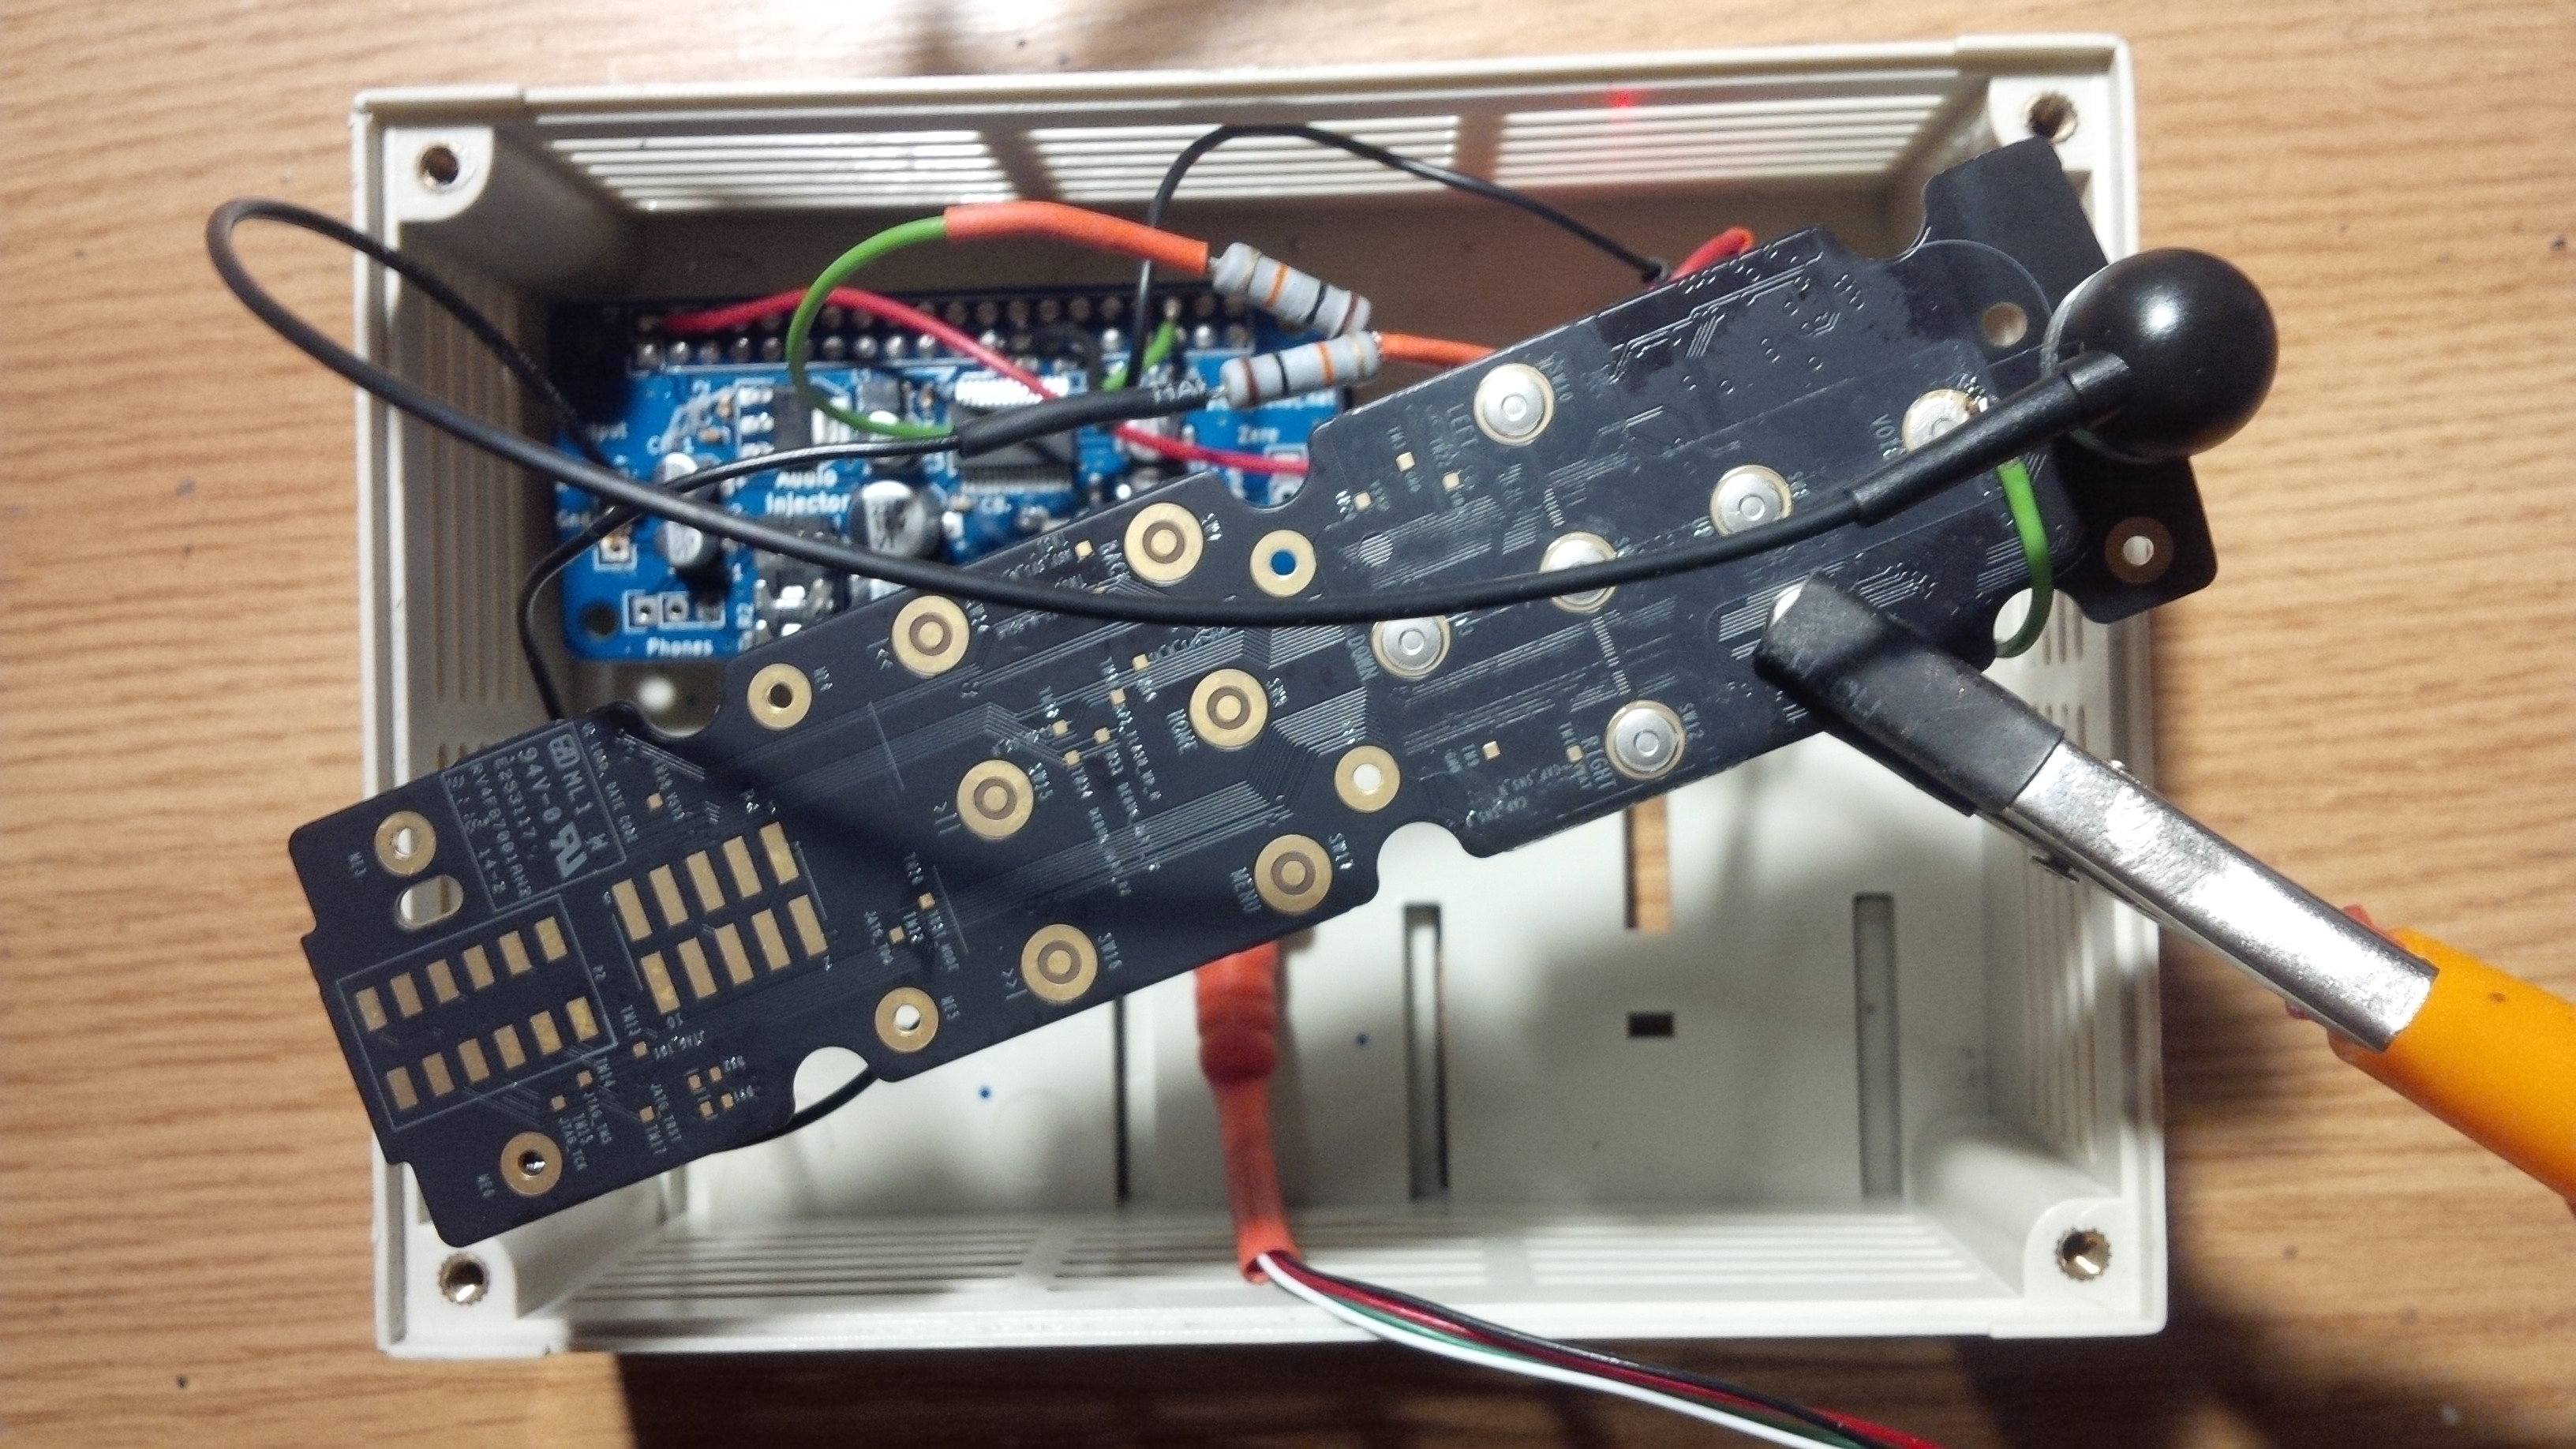
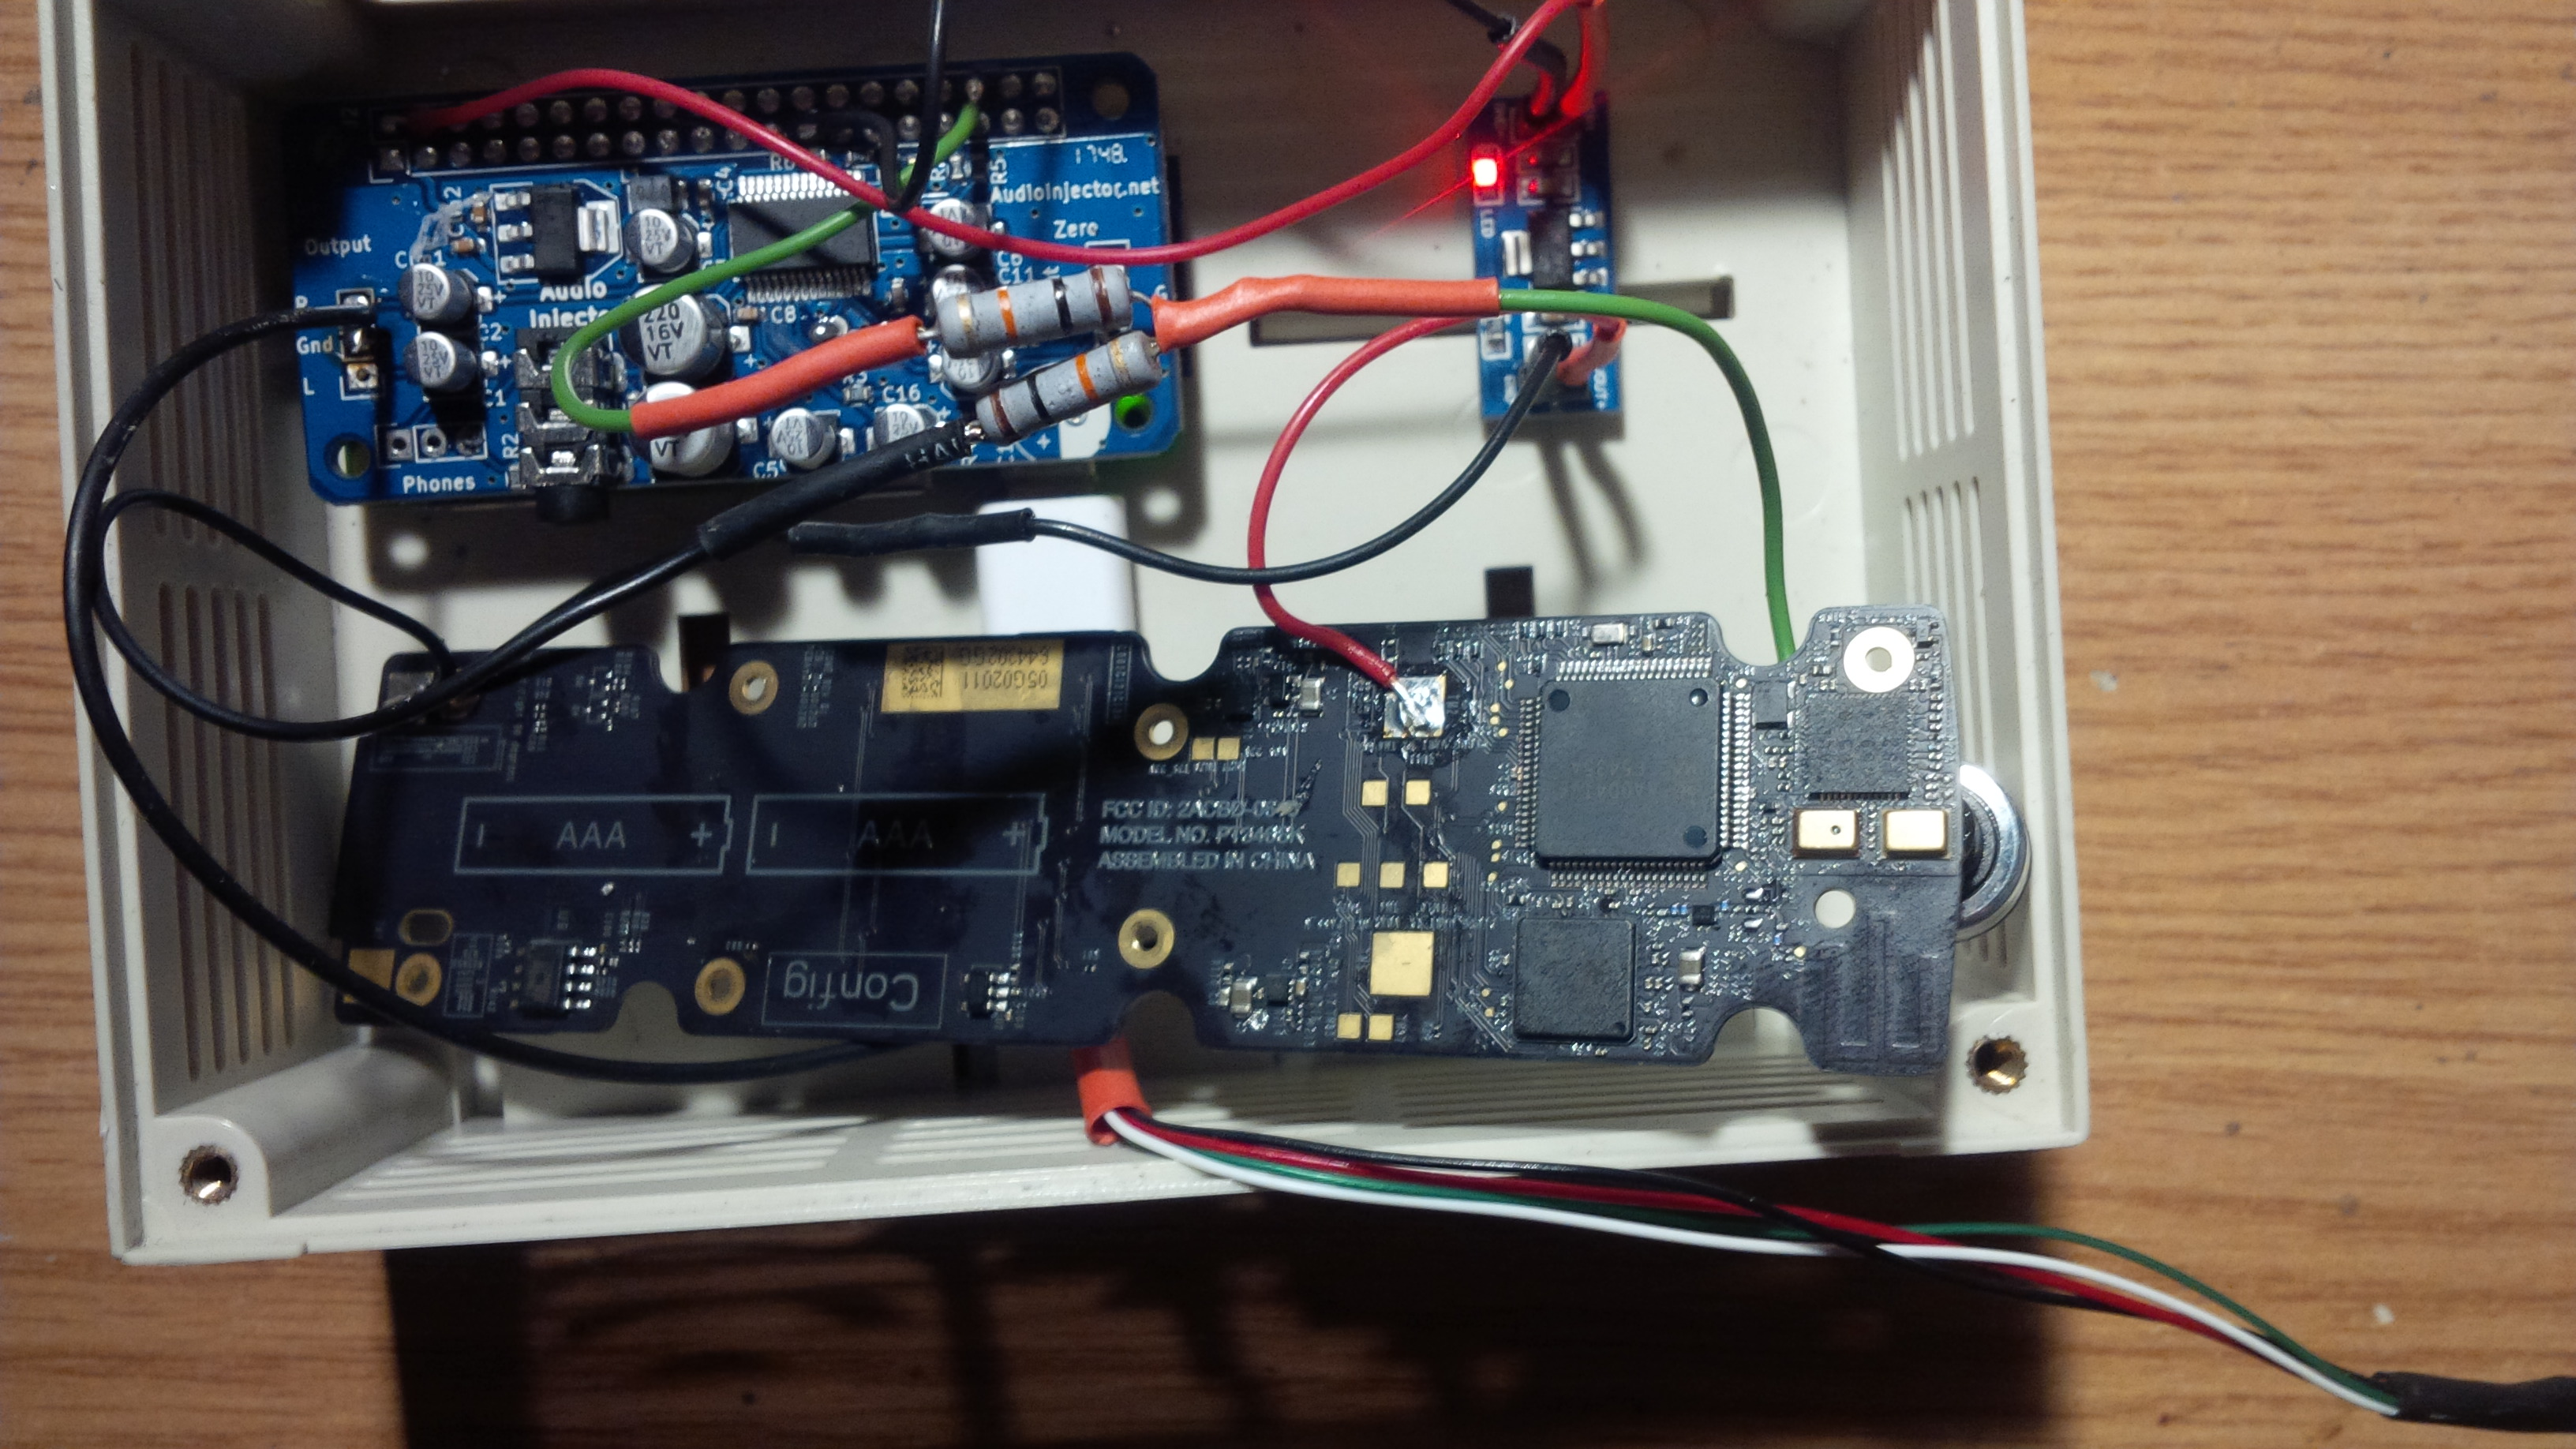
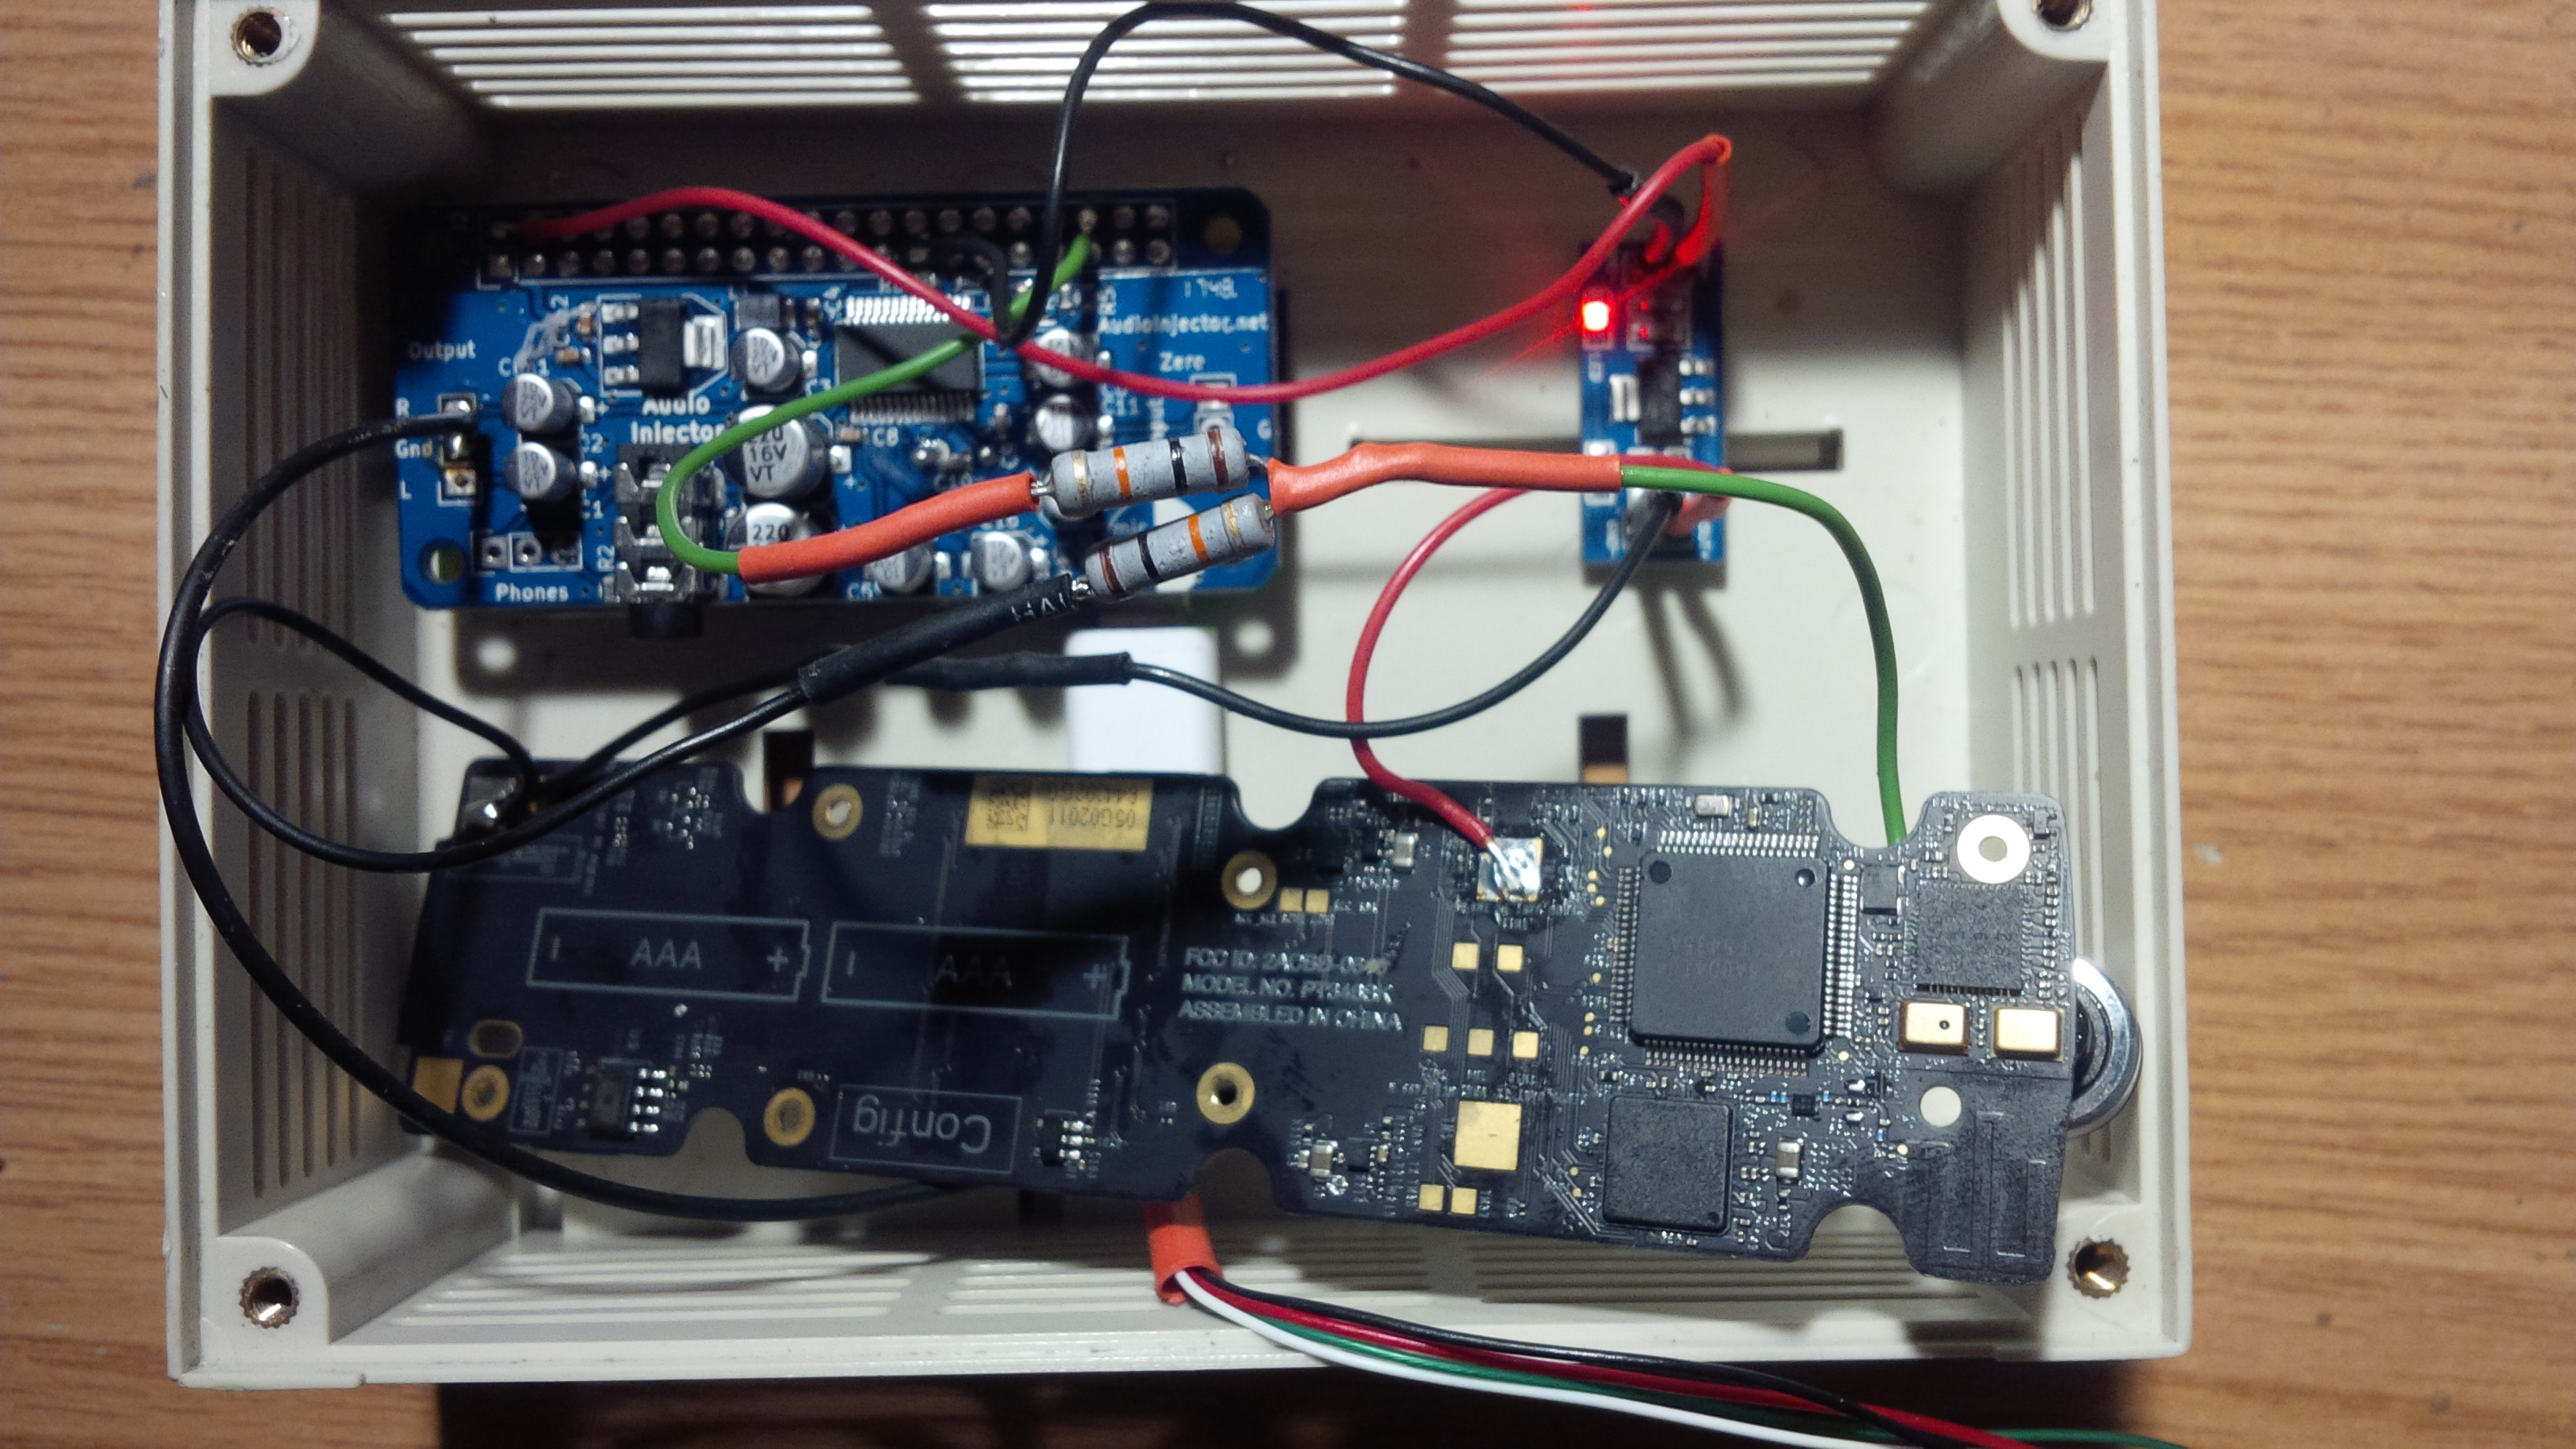
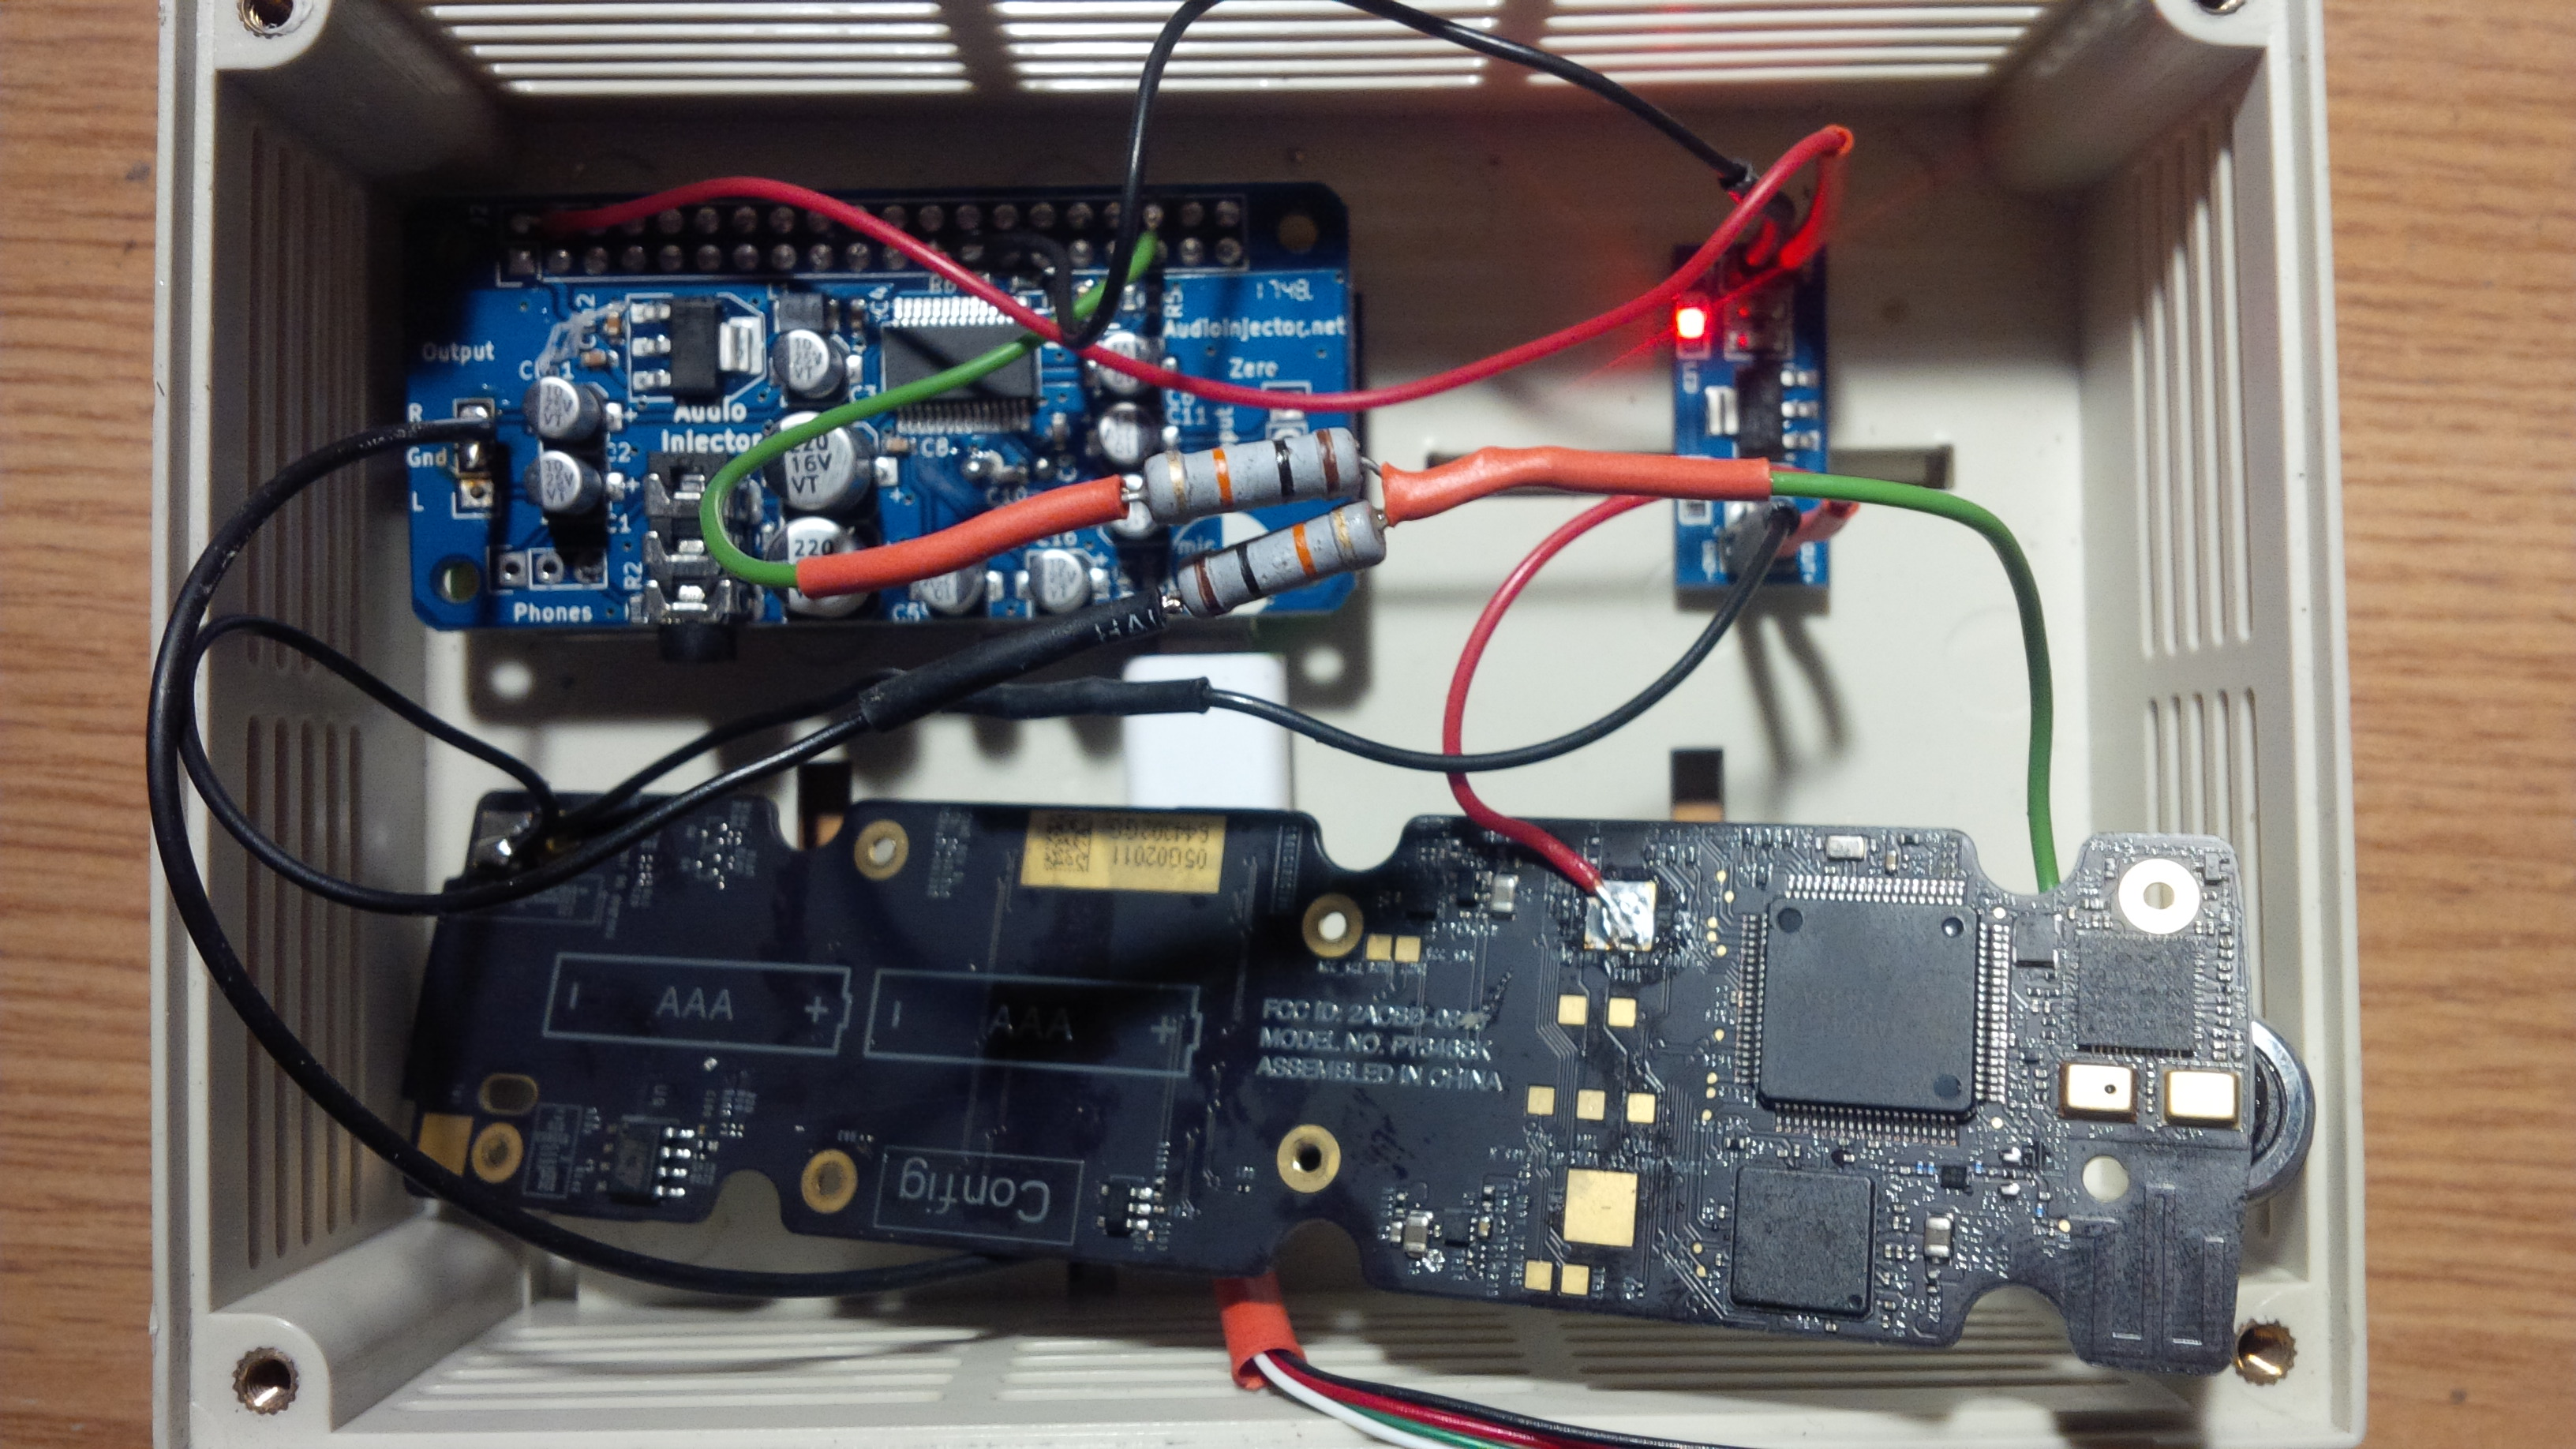
Assembling the Electronic Components
The following steps are roughly followed:
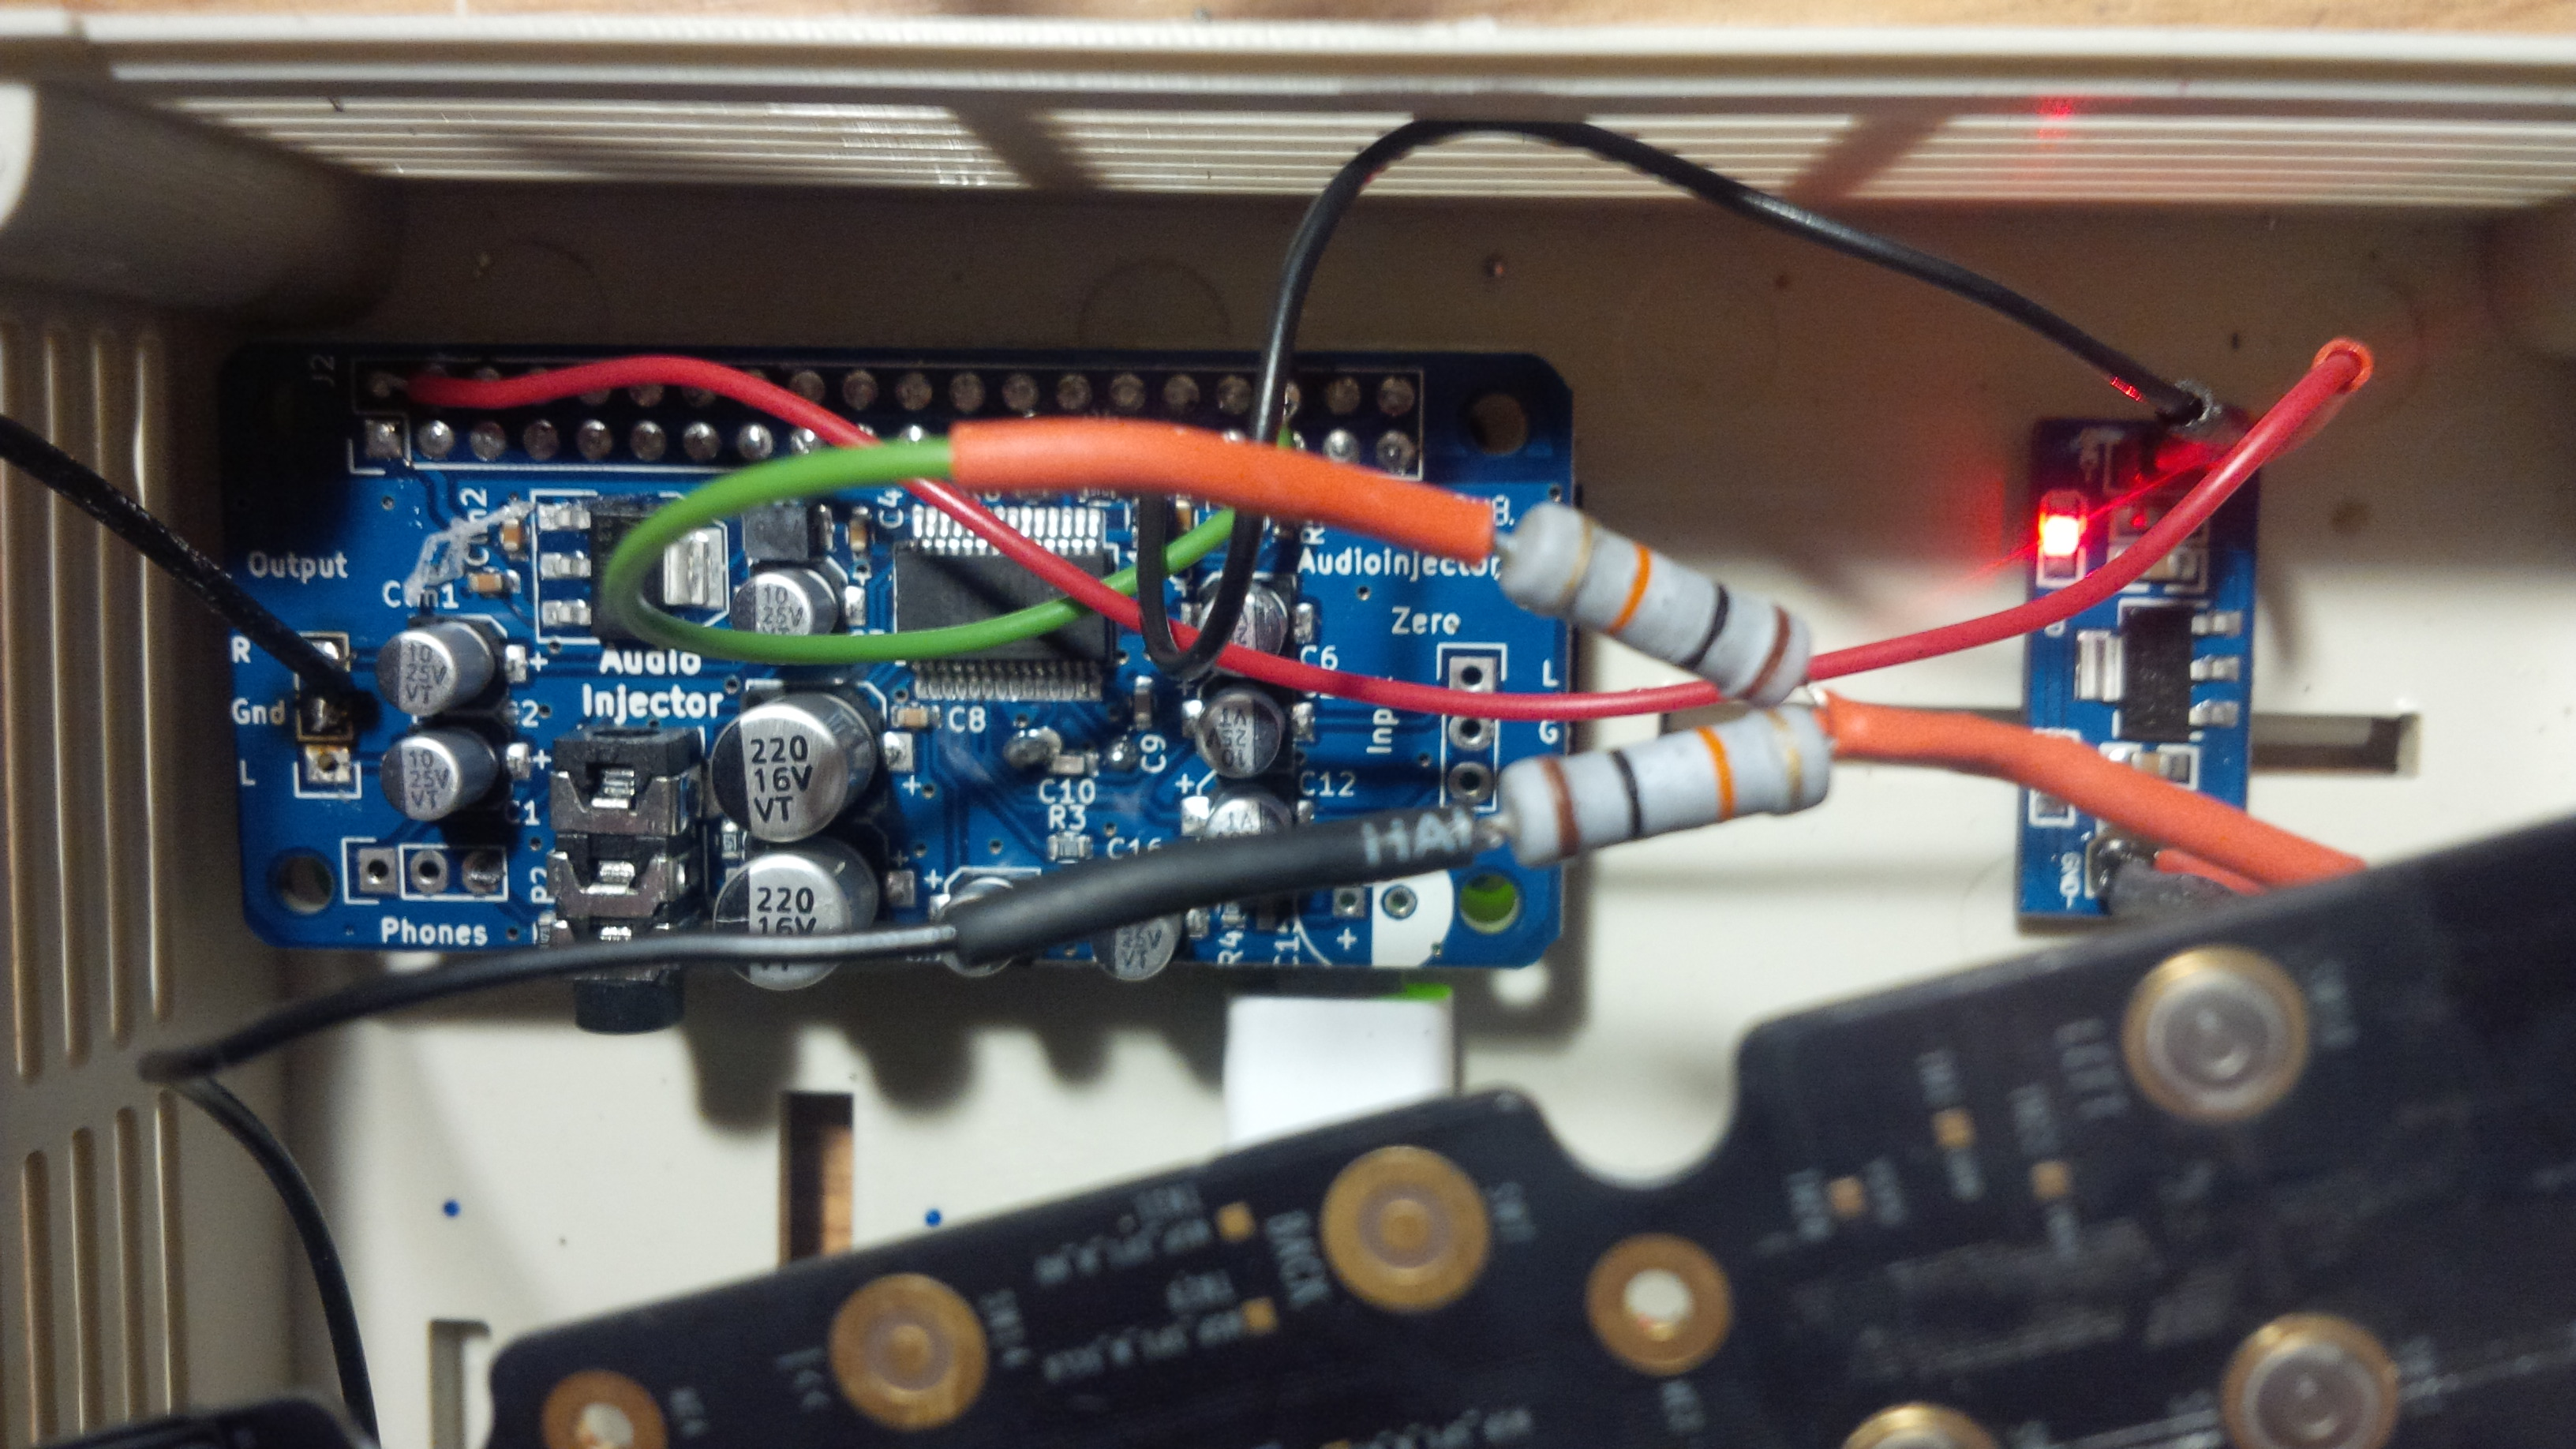
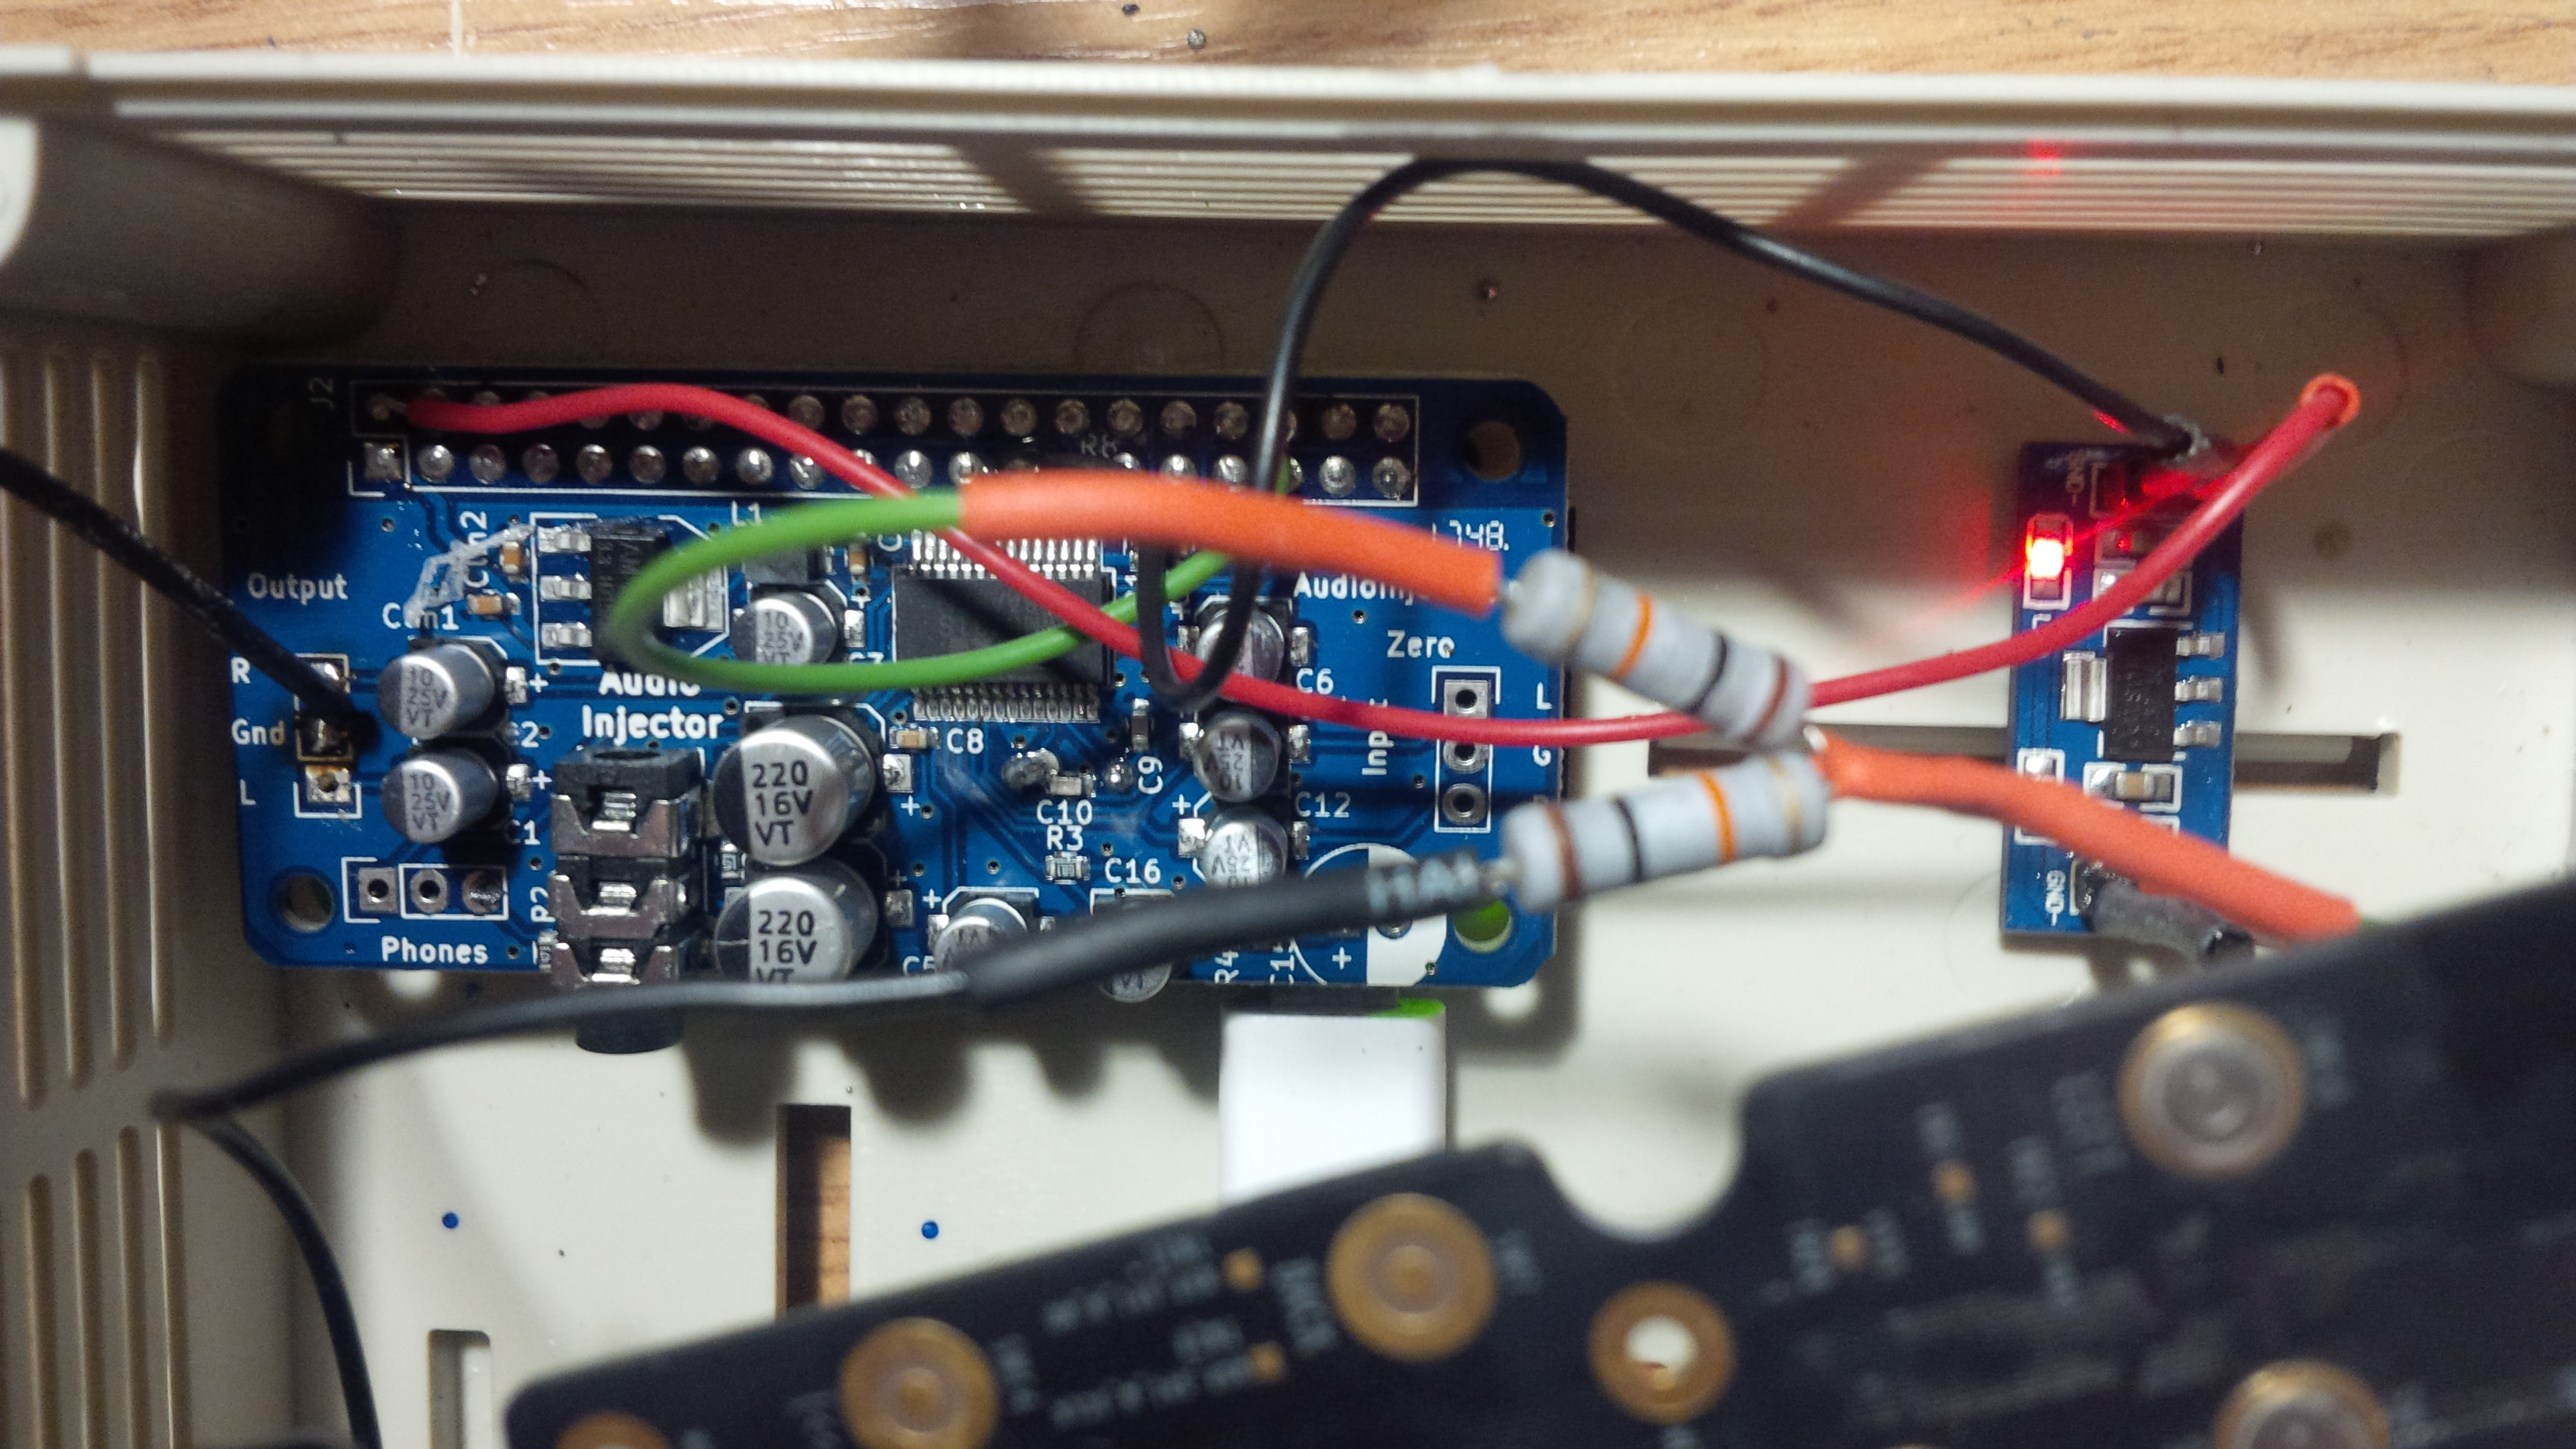
- The Audio Injector board is soldered onto the Raspberry Pi GPIO pins - a plastic sheaf could provide sufficient leverage such that the Audio Injector does not short-circuit the circuitry of the Raspberry Pi.
- The to stepdown circuit is soldered to the upper-right pin of the Raspberry Pi-Audio Injector sandwich and the ground of the stepdown circuit is connected to the ground pin of the Raspberry Pi.
- A lead is pulled from one of the free GPIO pins of the Raspberry Pi (a pin that is not used by the Audio Injector) and connected through the resistor-based voltage divider circuit to the round gold outer disc of the microphone button.
The Audio Injector uses only the I2S GPIO pins and the rest are free to use. Note that the Amazon Alexa remote used for this project has 6 buttons and that the entire remote could be wired up. In the end, for the purpose of this project, only a single pin needs to be used in order to open the microphone.
Gallery


Software Setup
The software setup consists in installing an operating system onto the Raspberry Pi, configuring the Audio Injector via ALSA and making sure that it works properly by playing some sample sounds, installing some TTS software and, finally, installing the provided software to subscribe to an MQTT server and wait for phrases to speak.
 So, let's get this right: you want to make a machine talk by making another machine ironically pretend that it is a legitimate human.
Indeed, one of the problems with this setup is that the TTS software is ironically more comprehensible to a human than to Alexa. Some of the good choices of TTS software is, in order, pico, festival and, lastly Google - although the latter will just create an additional dependency on Google providing a consistent service. . .
To use the provided software, subversion, nodejs, npm and mpg123 must be installed:
aptitude install subversion nodejs npm
After which, the sources can be checked out from the Wizardry and Steamworks SVN server:
svn co http://svn.grimore.org/alexatts
The config.yml.dist file has to be renamed to config.yml and then edited to point to the MQTT server to subscribe to and to set the GPIO pin that is used for the microphone button. Additionally, a TTS engine must be chosen in config.yml (Google TTS is the default choice and seems to work flawlessly).
Next, the packages required for alexatts must be installed by issuing:
npm install
inside the alexatts directory.
Once the configuration is in place, the AlexaTTS software can be started by issuing:
nodejs main.js
at which point AlexaTTS will subscribe to the MQTT topic configured in config.yml and await for messages to speak.
Closing Details
Although an Alexa remote has been used in this project, an alternative would be to bypass the remote entirely and somehow directly attach the speaker to the Alexa somehow. Perhaps, via a snap-on strap that could be attached to the Alexa - however, it may be possible that the earbud speaker would be too silent for the Alexa to perceive the sound.
Applications
- Announcing players joining a netplay session for arcade machines.


For the contact, copyright, license, warranty and privacy terms for the usage of this website please see the contact, license, privacy, copyright.