Table of Contents
About
Amiga's last operating system is OS3.9 (the development now focus on OS4 which has little to do with the Amiga) with two official boing-bags and two user-contributed boing-bags. OS3.9 can be run on a traditional Amiga with the help of few updates that patch the Kickstart 3.1 ROM. On the other hand, if you have an accelerator with a MAPROM feature, then the ROM can either be patched at boot time dynamically, or you can create a custom ROM image. This tutorial focuses on the later part which involves creating a custom ROM image.
Requirements
Hardware
- Amiga 1200
- Kickstart 3.1
- OS3.9
Software
- AmigaOS 3.9
-
- Optional: UrlText.mcc
- For ARexx scripts: rxasl.library
- For ARexx scripts: rmh.library
- For Anti-Virus features: xvs.library
-
Extracting Kickstart Files
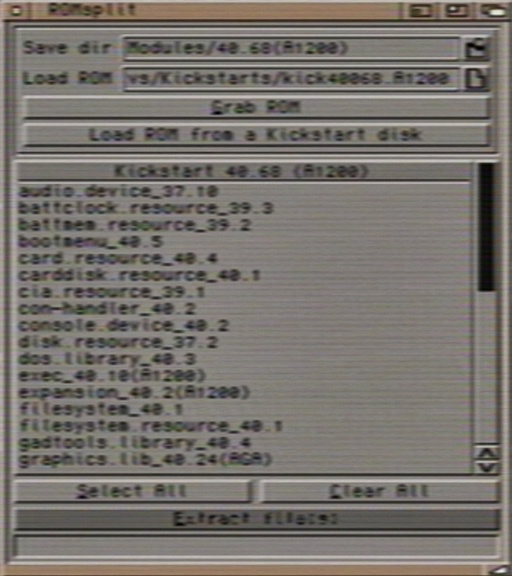
To extract the kickstart files we use the ROMsplit utility from Remus. Either click the Grab ROM button which grabs the from from the ROM installed in the Amiga or select a ROM using the file-requester for Load ROM. Once the pane has been populated with the contents of the ROM file, you can extract the files to a directory.
Next, we need to extract the OS3.9 ROM updates. This can be done by opening the DEVS:AmigaOS ROM Update.BB39-2 file in the ROMsplit utility. If you have OS3.9 installed, you will find the AmigaOS ROM Update.BB39-2 file in DEVS:. Otherwise, you will need to decompress BoingBag 2 update and locate the AmigaOS ROM Update.BB39-2 file.
By extracting both the Kickstart 3.1 ROM files and the files from the BoingBag 2 update, you will most likely end up with two directories under Remus/Modules/. These two will be:
40.68(A1200)- for Kickstart 3.144.57_ROMUpdate(3.9bb2)- from BoingBag 2
Now what we do is to create a new image by copying the files from Kickstart 3.1 unless there is an updated version in BoingBag 2 in which case we use the latter instead.
Cooking the ROM
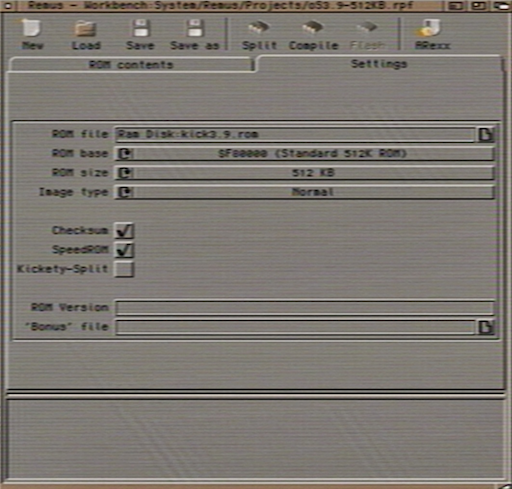
In order to cook the ROM, we use the Remus utility and copy over files from Kickstart 3.1 but update them with the files from BoingBag 2. First, we go to Settings and enter the path where the ROM file will be created (in this case, we entered Ram Disk:kick3.9.rom).
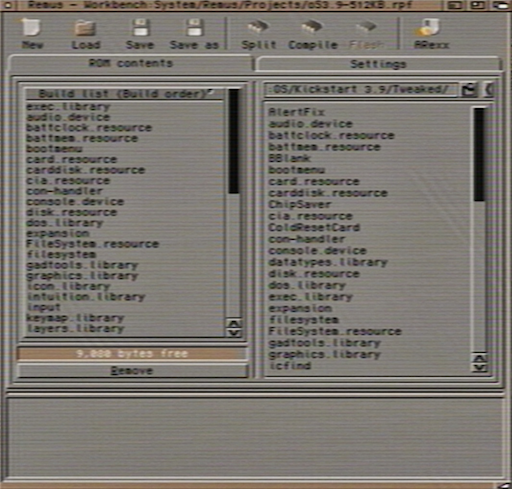
Now we go back to ROM contents and use the directory picker to select each files from both ROM directories that we extracted.
This is perhaps the most frustrating part of the experience and you can easily get it wrong. Here are some important guide-lines:
- The order in which the files are added is important - it is not random, not alphabetical, but rather a specific order that we will list below.
- You cannot exceed 512KB - there are some other tutorials that make a 1MB ROM but currently Blizzard accelerators and Apollo accelerators cannot kick a 1MB image. Even if you want to burn the ROM, you will first need to create a 512KB ROM.
- The name of the files is not important. If you look in the
40.68(A1200)directory and the44.57_ROMUpdate(3.9bb2)directory, you will notice that the version numbers are conveniently added to the file-name which will help you add the newest version.
The order in which the files should be added is the following - all these files are required:
exec.library
audio.device
battclock.resource
battmem.resource
bootmenu
card.resource
carddisk.resource
cia.resource
con-handler
console.device
disk.resource
dos.library
expansion
FileSystem.resource
filesystem
gadtools.library
graphics.library
icon.library
intuition.library
input
keymap.library
layers.library
mathffp.library
mathieeesingbas.library
misc.resource
potgo.resource
ram-handler
ramdrive
ramlib
romboot
scsi.device
shell
timer.device
trackdisk.device
utility.library
wbtask
wbfind
In order to add files, follow this easy procedure: we need to add exec.library. First check the Kickstart 3.1 directory (40.68(A1200)) for exec.library. Note the version and then compare it to the exec.library in the BoingBag 2 update (44.57_ROMUpdate(3.9bb2)) and add the one with the highest version. Then proceed to the next file from the list above that must be added and so on, till you add all the files. When you get to the last file wbfind you will notice that it is not there - it can be found in ROM/wbfind as part of the WT31.lzx archive.
Using the ROM File
Now that you have added all the files, you can press the Compile button in the Remus utility and the tool will start building the ROM. It will be saved to the file specified in the Settings tab of Remus. You can copy the file to a path and then use BlizKick to kick the ROM - for example:
C:BlizKick DEVS:Kickstarts/kick3.9.rom QUIET
Adding Customisations
You can customise both the required files as well as cook-in some Blizzard modules. For example, the exotica test page contains the GFX31.lzx, DOS.lzx and WT31.lzx files which contain updates to the libraries in the list mentioned in the previous sections. When updating, you will need to preserve the order of the files - if you change the order of the files, the Amiga will not be able to boot and most likely will show a yellow screen.
You can also add additional modules, for example, BlizzKick modules. For example, we can append the following list to the end of the previous list, right after wbfind:
datatypes.library
romfixes2
BBlank
MoveVBR
patchmath020-ALL
NoClick
ColdResetCard
ChipSaver
SpeedyIDE
NewAlert
AlertFix
which contain various fixes and enhancements to the system. In any case, all the fixes should go right after the last line of the previous list. If you mix them with the previous list, the Amiga will not boot.
For the contact, copyright, license, warranty and privacy terms for the usage of this website please see the contact, license, privacy, copyright.


