Table of Contents
About
iLO or Integrated Lights Out is a technology predominantly found integrated in HP servers that is able to provide access to a machine remotely as a separate system that runs in parallel with the server system. iLO-like technologies allow a server to be administered remotely - such as toggling power on and off, configuring server parameters at run time, checking hardware health status and overall providing a web-based management interface.
Using the Raspberry Pi, it is possible to implement an iLO-like side-system and attach it to some consumer hardware such as a PC or a non-corporate server workstation to provide similar services. Since we will be using IoT technology and low-power devices such as the Raspberry Pi, it is possible to improve on iLO, for instance, by attaching a LiPo battery to add some power outage resistance - a feature that iLO does not have.
Requirements
- Raspberry Pi Zero W v1.3.
- TP4056 5V 1A USB 18650 Lithium Battery Charger Board - used to charge the LiPo battery and simultaneously power the Raspberry Pi Zero.
- LiPo shim for Raspberry Pi Zero - allows powering the Raspberry Pi Zero using a LiPo battery.
2N3904transistor and or
or  resistor - used to create a GPIO switch that can be toggled by the Raspberry Pi Zero.
- An electronics project box
 - provides a great and compact enclosure for the project.
- A 4pin ATX power supply molex cable - the cable will be cut and connected to the LiPo mini battery charger in order to both power the Raspberry Pi and charge the LiPo battery when the PC is switched on.
Block Diagram
A block diagram can be sketched that would illustrate the project as a whole with the main components as blocks:
Note that the LiPo battery charger is connected both to a 4pin ATX power supply molex and one lead is drawn from the positive line to the  ATX power supply pin 9 in order to charge and keep the Raspberry Pi running even when the computer is powered off.
Designing the GPIO and Passthrough Switch
The GPIO and PWR_ON passthrough is a 2N3904 NPN BJT transistor switch used for other projects. However, the schematic is slightly different in order to allow powering on the computer using the case switch button as well as using a signal from the Raspberry Pi.
                          +---------+---------> to motherboard PS_ON
                          |         |
                          |         |
                          C         |
                        |/           /
 +-- GPIO +---+/\/+----B|  2N3904   + Case
 |           460kOhm    |\          | switch
 |                        E         |
 - GND                    |         |
                          +---------+---------> to motherboard PS_ON / GND
                          |
                          - GND
Assembling
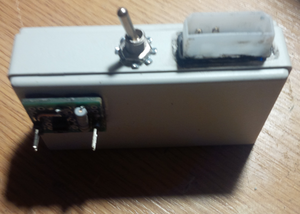
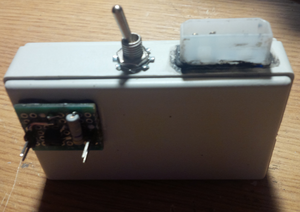
An additional feature is to add a switch that can pull a lead on the LiPo shim low in order to turn off the Raspberry Pi regardless whether it is powered from the computer or from the battery. This is sometimes necessary in case the Raspberry Pi needs to be reset or to work on additional features.
Additional Hardware Features
With the custom iLO in place and benefiting from the many GPIO pins available on the Raspberry Pi, further hardware enhancements can be used to extend functionality. For instance, thermal sensors can be added in order to monitor the temperature of the CPU and other chips on the motherboard.
The IoT Connection
Using OpenHAB2 and the Amazon Alexa, it is possible to power on the computer by speaking to Alexa. Wizardry and Steamworks provides PiLo written in Node.js that can be installed on the Raspberry Pi in order to expose the hardware to other IoT capable devices and software. PiLO exposes controls and measurements via MQTT allowing other devices and software to query the status of the computer that the project is attached to. To download PiLO, issue:
svn export http://svn.grimore.org/pilo/trunk
and configure PiLO by editing the configuration to be found in config.yaml. PiLO can be made to start on boot by editing and copying over the provided systemd service file from the contrib directory to /etc/systemd/system and then issuing:
systemctl enable pilo
followed by:
systemctl start pilo
OpenHAB2 has to be configured by browsing to the PaperUI and then the following addons have to be installed:
- the MQTT binding,
- the Amazon Alexa binding
A new item is created under /etc/openhab2/items with the name pilo.items and with the following contents:
/*************************************************************************/
/*                               PiLo                                    *
/*                                                                       *
/* http://grimore.org/iot/designing_ilo                                  *
/*                                                                       *
/*************************************************************************/

Group PiLo "PiLo" <power>

Switch PiLo_Amiga_Maintenance "Maintenance" <settings> (PiLo)

Switch PiLo_Amiga_Switch "Amiga" (PiLo) ["Switchable"] {
    mqtt=">[mosquitto:pilo-1:command:ON:switch],>[mosquitto:pilo-1:command:OFF:switch]"
}
where:
pilo-1is the topic configured inconfig.ymlforPiLo,Amigais the device name that will be used with Amazon Alexa
After that, PiLo_Switch has to be referenced in the sitemap under /etc/openhab2/sitemaps/, perhaps in its own "Environment" frame:
    Frame label="Equipment" {
        Default item= PiLo_Amiga_Switch
    }
Gallery
For the contact, copyright, license, warranty and privacy terms for the usage of this website please see the contact, license, privacy, copyright.


